6.9 KiB
title: "Aaron A-Shirt: Sewing Instructions"
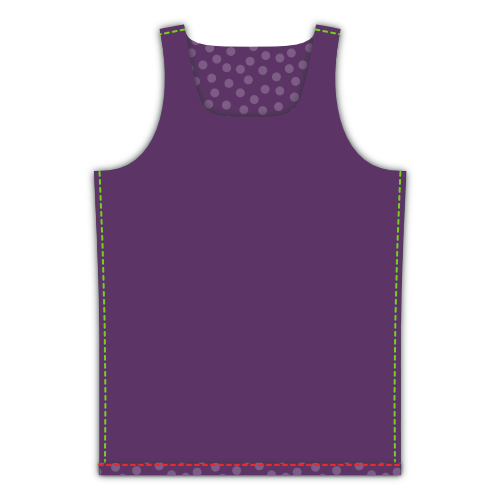
Schritt 1: Nähte schließen

Put front and back on top of each other with good sides together. Sew the side seams and the short seams at the shoulder straps. If you have a serger, this is a good moment to use it. If not, finish your seams otherwise.
Schritt 2: Saum versäubern
Fold the hem upwards, and sew it down. If you have a coverlock, use it. If not, use a twin needle or zig-zag stitch to keep the seam stretchable.
Fold only once, to avoid bulk
Knitwear doesn't ravel, so you can simply fold this over once and sew it down, then neatly trim back the fabric.
Schritt 3: Nähen Strickbindung an die Vorderseite
Über Strickbindungen
Wenn du neu bist binden, kannst du diese Seite auf dem Betreff lesen lesen.
Wiederholen Sie die Schritte 3 und 4 für die Armlöcher und die Halsöffnung
und das unten beschriebene Verfahren gilt sowohl für die Armlöcher als auch für die Halsöffnung. Mit anderen Worten: Sie müssen das dreimal tun.
Beginnen Sie mit der einfachsten Öffnung
Ich würde Ihnen raten, mit jeder Öffnung zu beginnen, die die einheitlichste Krümmung hat. Standardmäßig sind dies die Armlöcher, aber wenn Sie die Musteroptionen (denken Sie an Rennen) geändert haben, ist dies möglicherweise nicht der Fall.
So oder so, je weniger scharfe Kurven Sie haben, desto einfacher wird es sein. Also beginnen Sie mit dem Aufwärmen, bevor Sie die dreckigen Kurven machen.
We are going to finish the arm and neck hole with knit binding (note: not a knit band. There's a difference, and it's explained here).
Dies ist der einzige Teil, um dieses A-Shirt zu machen, das ein bisschen Praxis erfordert. Keine Sorge, alles was du tun musst, ist ein paar davon zu machen und du wirst in kürzester Zeit ein Profi sein.
Wähle deinen Platz

The first thing we need to do is decide where we are going to start/stop our binding. Here's what I suggest:
- Für die Armlöcher: an der Seitennaht. Dies wird unsere Naht unter dem Arm verbergen
- Für die Halsöffnung: die Mitte des Halsrückens. Möglicherweise möchten Sie dies mit einem Pin markieren
Platzieren Sie den Beginn Ihrer Bindung

Put your A-shirt down with the good side up, and place your binding strip on top of it with the good side down (as in, good sides together).
Align the long edge of your strip with the edge of your fabric so the strip lies on top of the fabric (not in the opening). Place the corner on your starting point.
Now shift your binding strip 1cm beyond your starting point. This little extra will guarantee we can join the two ends later.
Vergewissern Sie sich, dass Sie wissen, wo Sie nähen sollen

We are going to sew 1.5cm from the edge. So be careful because this is not the standard seam allowance.
Der einfache Weg, diese 1,5 cm Distanz zu halten, ist mit einer Nahtspur. Oder machen Sie, was ich tue, platzieren Sie ein Stück Markierungsband auf Ihrer Nähmaschine und markieren Sie eine Linie auf 1,5 cm aus Ihrer Nadel. Dann musst du nur den Rand deines Stoffes an dieser Linie angleichen.
Also, we are not starting at our start point, but we skip the first 3cm. We'll need this wiggle room later to join the ends of our binding.
Sew binding in place

Sew your binding in place while gently stretching the binding, but not the fabric. Make sure not to sew the last 3cm but leave them, just as you did at the start.
You might need to practice a bit to get the hang of it.
Achten Sie darauf, Ihre Bindung mehr zu strecken, wenn Sie eine schärfere Kurve nehmen. Lesen Sie meine Notizen auf Strickbindung für weitere Informationen.
Bindungsende markieren

With about 6cm left to go before we complete our circle, it's time to sew the ends of the binding together.

Take one of the edges, and stretch it along the 3cm seperating it from the start point as you would while sewing.
Mark the binding where it reaches the start point. Do the same for the other end.
Nähbindung endet zusammen

Fold your A-shirt in whatever way makes it easier for you to place both binding ends with good sides together, aligning the marks. Sew them together on the mark.
6 cm ist nicht viel, aber sollte ausreichen, um beide Kanten bequem unter Ihrer Nähmaschine zu nähen.
Beende die letzten 6 cm Bindung

Now that your binding ends are joined together, it's time to finish the last 6cm of binding. Sew it down, staying 1.5cm from the edge as you did before.
Schritt 4: Strickbinder an den Rücken falten und nach unten nähen
Falte deine Bindung über die Stoffkante auf die Rückseite
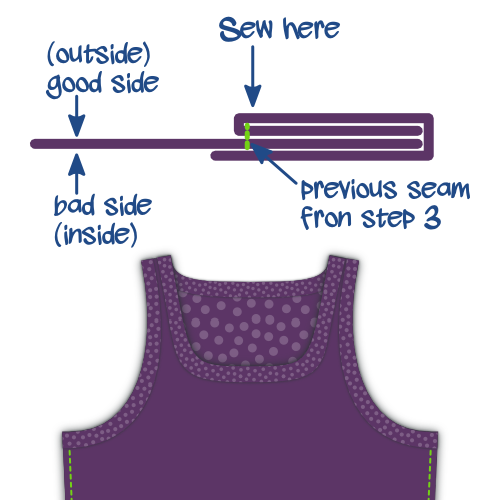
Fold your binding fabric around the fabric of your A-shirt to the back. This is how we'll sew it down.
Während der Stoff doppelt geklappt ist (Verstecke den Stoffrand im Prozess), ist das auf der Rückseite nicht nötig. Wir werden später nur noch den Rand zurückschneiden, da der Strick nicht schwenkt. Wenn wir den Stoff auch auf der Rückseite zurückklappen würden, würde er nur noch mehr massieren.
Nähen Sie Ihre Bindung

From the right side of your fabric, sew along the inner edge of your binding (furthest from the edge), making sure to catch the binding at the back in the process.
Wenn Sie eine Coverlock Maschine haben, wäre das perfekt für diese Naht
You'll have to, once again, stretch your binding a bit while doing this. But this time, there's an extra caveat to look out for.
Beware of the uneven feed
As you feed your binding through your sewing machine, the feed dogs will pull the bottom layer (back of your binding) forward.
In einer perfekten Welt folgen alle Ebenen reibungslos. In den meisten Fällen hinkt die obere Ebene (vor der Bindung) ein bisschen hinterher. Dadurch wird Ihre Bindung nicht sauber am Stoffrand gefaltet, sondern hässliche Falten erzeugt.
Also achte darauf, und wenn du das siehst, strecke die Unterschicht ein bisschen extra um sie zu kompensieren.
Schritt 5: Strickbindung nach innen trimmen

On the inside of your A-shirt, trim back the knit binding against your seam to finish up.
Achten Sie darauf, nicht ein Loch in Ihr A-Shirt zu schneiden. Im Ernst, das ist mir mehr als einmal passiert.